라벨이 Notification인 게시물 표시

[IOS] Image Notification Push 구현하기

이미지
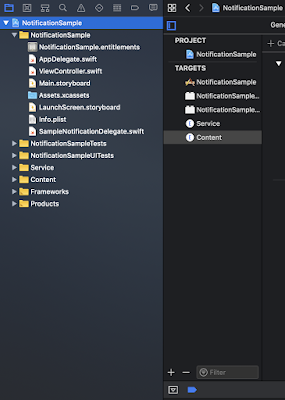
[IOS] Image Notification Push 구현하기 APNs를 이용해서 푸쉬 를 보낼 수 있다는 가정하게 작성된 글 입니다. Image Push Notification 만들기 (Using Notification Service Extension and Notification Content Extension). 기본적인 알림 기능 이 동작하고 있다고 가정하고 설명합니다. service extension과 content extension을 추가해줍니다. Service extension은 Service라는 이름으로, Content extension은 Content라는 이름으로 추가 해 줍니다. xcode > Editor > Add Target > Notification Service Extension > productname : "Service" > Next > Finish xcode > Editor > Add Target > Notification Content Extension > productname : "Content" > Next > Finish 추가 후 결과 화면은 다음과 같습니다. Service > NotificationService.swift는 다음과 같습니다. import UserNotifications class NotificationService: UNNotificationServiceExtension { var contentHandler: ((UNNotificationContent) -> Void)? var bestAttemptContent: UNMutableNotificationContent? override func didReceive(_ request: UNNotificationRequest, withContentHandler conten

[IOS] Notification Push 구현하기

이미지
[IOS] Notification Push 구현하기 순서 푸쉬계졍 생성 (apple-membership) 어플리케이션 제작 Push Notifications(푸쉬를 날려줄 도구) 1. 푸쉬계졍 생성 참고 블로그 : https://faith-developer.tistory.com/153 푸쉬를 위해서는 계정이 필요하다. a. 인증서 생성 b. App ID 생성 (Identifiers) c. Push 인증서 등 록 (Certificates) a. 인증서 생성 키체인 접근 > 인증서 지원 > 인증 기관에 인증서 요청 > 이메일주소입력 > 디스크에 저장 > CertificateSigningRequest.certSigningRequest 파일 저장 b. App ID 생성 identifiers > +버튼 > appId > bundleId 입력 > Push Notifications 선택 > Continue > Register c. Push 인증서 등록 identifiers > bundleId 선택 > Configure > Development SSL Certificate > Create Certificate > 위에서 생성한 CertificateSigningRequest.certSigningRequest 파일 업로드 > Countinue > Download > aps_development.cer 다운로드 다운받은 aps_development.cer를 실행하면 키체인에 등록된다. 등록된 키 체인에서 push_cert.p12 파일로 내보내준다. 이 파일은 후에 메시지를 전송하는데 쓰인다. 2. 어플리케이션 제작 참고 블로그 : https://www.raywenderlich.com/8164-push-notifications-tutorial-gettin